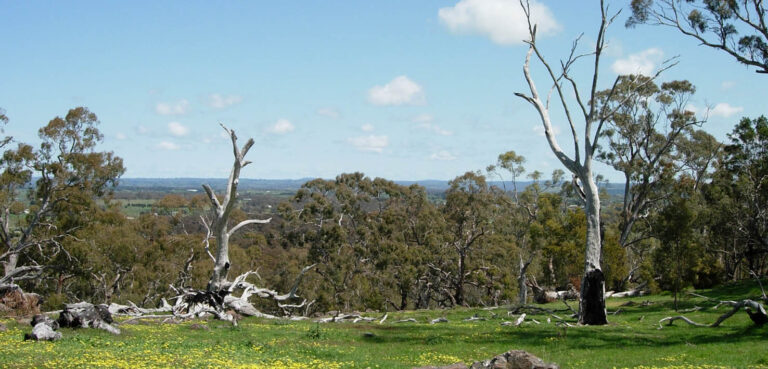
Koala Habitat Mapping and Monitoring

You, Me and Biodiversity – Wombat Forestcare

Photo by Jordan Whitt on Unsplash

Each year, Wombat Forestcare presents ‘You, Me and Biodiversity’ – a series of lectures or workshops to explore biodiversity in our local setting, how we are all part of a dynamic circle of life and what participants can do to enhance biodiversity. The workshops emphasise how participants can become more connected with their environment in their minds, in their homes and in the forest. It is hoped people will come away with practical knowledge, a heightened sense of empowerment and wonder at this complex, teaming environment we live in.

Wombat Forestcare’s ‘You, Me and Biodiversity’ program is pleased to have two speakers share their knowledge and experience on koala habitat mapping and monitoring, Jackson Cass from Moorabool Landcare and Dave Mitchell from the Australian Koala Foundation on Saturday 29 July 2023, 2.00 to 3.30pm at the Trentham Neighbourhood Centre, Trentham.

Jackson will talk about a joint project with the CSIRO, the Wadawurrung Traditional Owners, and the local community as part of the National Koala Monitoring Project. Through this collaborative approach the aim is to fill knowledge gaps for future koala recovery and management efforts.

Dave Mitchell is a landscape ecologist and well known for his work in mapping koala habitat across Australia. He is currently completing his PhD on this topic at RMIT. He will share with us some of the mapping work occurring locally and in Victoria.

Wombat Forestcare would like to invite you to be part of these efforts and ask you to begin or continue koala monitoring!

Further details:
The presentations will be followed by afternoon tea.
Cost: Gold coin donation
Bookings: TryBooking:  https://www.trybooking.com/CJNVZ
Words by Gayle Osborne – Wombat Forestcare info@wombatforestcare.org.au

The Bush Bank Program – Revegetating land to reduce carbon emissions and create habitat for some of Victoria’s most iconic species.

How private landholders can get involved with this ambitious project

The Victorian Government is investing $30.9 million to revegetate and restore at least 20,000 hectares of native habitat across private land in Victoria. That’s an area 10,000 times the size of the Melbourne Cricket Ground (MCG) or twice the size of Phillip Island, which will be transformed into healthy habitat for native wildlife.

Cassinia Environmental is the government’s delivery partner for the BushBank program and they will work with more than 20 other partners to secure significant co-investment to achieve this ambitious goal. 

Cassinia Environmental will support private landowners throughout their restoration projects and help them tap into financial incentives available through biodiversity and carbon markets.

“Cassinia is excited to be the Department’s selected Delivery Partner for the private land stream of the BushBank program. This is an ambitious program that will see 20,000 hectares of land (an area twice the size of Phillip Island) restored and permanently protected into Victoria’s private conservation estate. Victoria’s biodiversity needs this intervention. We look forward to working with the Department, Trust for Nature and the many international and local partners to make this a reality.”  Nathan SmithCassinia Environmental CEO

Cassinia Environmental is now taking expressions of interest to participate in this exciting and innovative private land stream of the BushBank program.

Guidelines: go to www.cassinia.com/bushbank for landholder project guidelines, including details about the BushBank program.

BushBank Program overview: Nature restoration for carbon storage – BushBank program (environment.vic.gov.au)

Expressions of Interest close: 31 July 2023 for the pilot stage of the BushBank program, and are submitted at www.cassinia.com/bushbank.

Note: Expressions of Interest received after 31 July 2023 will be considered for future rounds of the BushBank program. 

More information: contact Cassinia Environmental on bushbank.partner@cassinia.com or call 1300 572 164 to discuss your proposal.


Using an IBC Container to build Wicking Beds

Words and images by Mark Ridgeway of Pipers Creek Landcare – Mark established these beds in 2018 and has been enjoying fresh produce from them ever since!

ABC’s Gardening Australia have a great segment on this – the method Mark describes below is very similar with the exception of the location of the outlet pipe.

You will need:
  • One food-grade IBC Container – food grade or know what was in it
  • Two inlet pipes  (Drainage/waste grey pipe) – 50mm X 1m
  • Two caps – slip (pressure – white) – 50mm
  • Tow bends (drainage/waste) – 50mm 85º
  • Two Poly elbows (black & threaded) 15mm
  • Two tank connectors – black poly, threaded with back nut 15mm
  • Two poly pipes (black and threaded) – 150mm X 15mm
  • Gaffer tape, pipe glue and teflon tape
  • Two lengths of agricultural pipe – 2m X 50mm
  • Geofabric/geotextile cloth – 1m X 10m ( you can also use doubled over weed mat)
  • Good quality friable soil – approx. 0.5 metre (standard trailer load) – should do both beds
  • One-inch scoria – approx. 0.5 metre (standard trailer load) – should do both beds
  • Some mulch – pea straw or equivalent – sufficient to cover top of bed
  • Some form of timber pallet or base; alternatively sufficient timber to build a base for each wicking bed or sufficient gravel of scoria to build a level and supportive base. Note that only the wicking bed created from the top half of the IBC tank strictly needs a base, however, you may desire to raise the height of the beds overall.
  • Optional – sufficient suitable material to build decorative surrounds for the wicking beds. The surrounds can also serve to limit light availability to the slightly transparent plastic tank, thus limiting algal growth in the water reservoir.
Preparation:
  • Unbolt the aluminium straps at top to release the plastic container from the frame.
  • Use an angle grinder to cut in half – both the frame and plastic container (I found it was easier to use the angle grinder on the metal and then a jigsaw on the plastic). Give the two halves a good wash out.
  • Check the two halves for water tightness (quarter-fill with water and leave overnight). You will probably need to silicon the seal around the circular lid in the top half of the tank and may need to seal off the outlet tap on the bottom half.
  • Whilst waiting for the silicon to dry, attach the two 85º bends to the ends of the two one-metre inlet pipes using the pipe glue to fix them in place. Then attach a two-metre length of agricultural pipe to the exposed end of each bend and seal in place with gaffer tape.
  • Once you are satisfied that the tanks are water tight (test and test again!) – use a hole saw to drill the outlet pipe hole – as close to the base of the tank as practical (don’t go too close to the bottom – the large washer on the tank connector goes inside the tank and it needs to fit! Some tanks have a thickening of the plastic on the inside close to the bottom that can be deceptive and missed if you are only looking and checking from the outside of the tank).
  • Insert and attach the tank connectors – use teflon tape as appropriate to seal the connection. Don’t attach the elbows or poly pipe yet as it is a good idea to do this once the tank is in its frame and in its final location.

Site Preparation
  • Ensure that your chosen site is suitable for growing vegetables – exposed, sunny and within range of a tap.
  • The site should be weed free and it must be level. I laid down plastic to discourage weeds growing up between the beds and put down additional scoria to create pathways.
  • Set up the bases for your wicking beds – whether they are pallets, wooden frames or gravel/scoria. Note that one of your beds will already have its own stable metal frame but the other bed will need some degree of support. As this is the old top of the IBC tank, its base will have multiple levels – I custom made a pallet to support it but strategic use of gravel/scoria and/or placement of timber can achieve the same outcome. You may wish to raise the beds further off the ground to improve access – this is up to you.
  • Transfer the plastic wicking beds and their frames to the site. Position the beds on the site. Ensure that they are level, the drainage points the right way and there is sufficient space between beds for access (remembering that you will be working, gardening, moving stuff in and out, digging etc.)
  • Once you are happy with the location of your beds, attach the remaining elbow and poly pipe to the outlet component- using teflon tape again where necessary (once the scoria has been added, you will need to cut the poly pipe to the required length). Again, half fill the tanks with water and leave to test for leaks in the system.
  • The outlets for our wicking beds have been designed so that you can drain the water reservoir by turning the pipe on its side. This enables the beds to be drained in winter so as not to become waterlogged and to be flushed out when necessary (it is very easy to over fertilise a wicking bed).
Creating the Wicking Beds
  • Set up your inlet pipes along with the agricultural pipe attachments into the wicking beds.You may need a couple of bricks to temporarily hold everything in place until you add the scoria.
  • Place about 200mm of scoria into each of the beds. You need to keep between 200 and 300mm of room above the scoria line in the top half of the bed for the soil. The soil shouldn’t be any deeper than 300mm as the wicking action starts to fail at that point.
  • Note that some wicking bed designers are now advising that the scoria/cloth layer can be overkill and the beds continue to work just fine by filling them with soil. If you were to do this you would need to put a protective sock over the agricultural pipe to stop it filling with soil.You would also need to attach a short, socked piece of agricultural pipe to your outlet drain to keep the soil from washing out of it. Some people take this latter step anyway to ensure the pipe doesn’t become blocked – however I haven’t had a blockage problem using the one-inch scoria.
  • At this point you can shorten the upright drainage poly pipes to the required height at the top of the scoria layer. Use a hack saw to carefully shorten the pipes. (I wrap a piece of masking tape around the pipe at the required height and then mark on the tape using a spirit level against the top of the scoria layer. The masking tape also help you to keep the cut straight with the hacksaw).
  • Now add a layer of the geotextile fabric across the top of the scoria. You can also use a piece of doubled over weed mat as a substitute.
  • Now add your soil. It is important that the soil is good quality,light, and friable. A dense soil can become water-logged and start to pong (apparently a common problem with wicking beds) due to anaerobic activity – particularly if it is well fertilised.
  • It is also a good idea at this point to shorten your inlet pipes down to an appropriate height. Again use your hacksaw assisted by some masking tape around the desired section of the pipes. Use the Slip Caps to seal off the top of the pipes and keep it clear of unnecessary critters – mosquitos, animals etc.
  • At this point you can start dressing up the external part of the beds. I used a mixer of recycled materials including tin and timber.
  • Once you are happy with your beds, plant them out and mulch with the pea straw and whatever you have chosen to use. Fill the beds with sufficient water to overflow the outlet pipe. Give them a day or two to start wicking properly and remember that you will still have to water new seedlings in until their roots establish.